Learn How to Install Solar on Stone Coated Steel Roofs:
with QuickBOLT and Unified Steel™, a Westlake Royal Roofing Solutions brand
QuickBOLT recently joined Pete Croft, Brand Manager for Unified Steel™ to observe a solar installation on a PINE-CREST Shake Stone Coated Steel roof install done by Western Roofing Systems. There we learned tips and tricks on how to improve efficiency for a solar installation on this type of roof material.
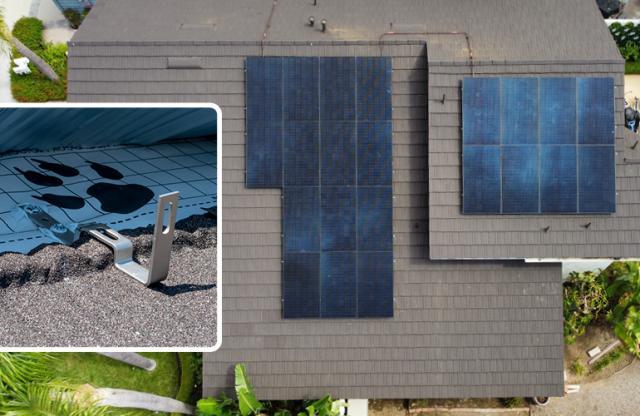
In a lovely twist, we first learned what NOT to do by looking at the house next door, how convenient! Many contractors in today’s market falsely believe that to install solar on a Stone Coated Steel roof they must first remove the stone coated steel and then install asphalt shingles to create a flat area to install the new solar system. See the picture below for an example.
Installers on the roof we visited easily debunked the belief we mentioned above. They demonstrated the exact opposite to be true – you can install solar on Unified Steel’s Stone Coated Steel roofs (*PINE-CREST Shake, PACIFIC Tile, COTTAGE Shingle or BARREL-VAULT Tile profiles) without penetrating the roof panels or removing the roof at all.
In this article, we will show you how to accomplish this seemingly ‘impossible’ task. Read below for installation steps or click here to watch the installation video.
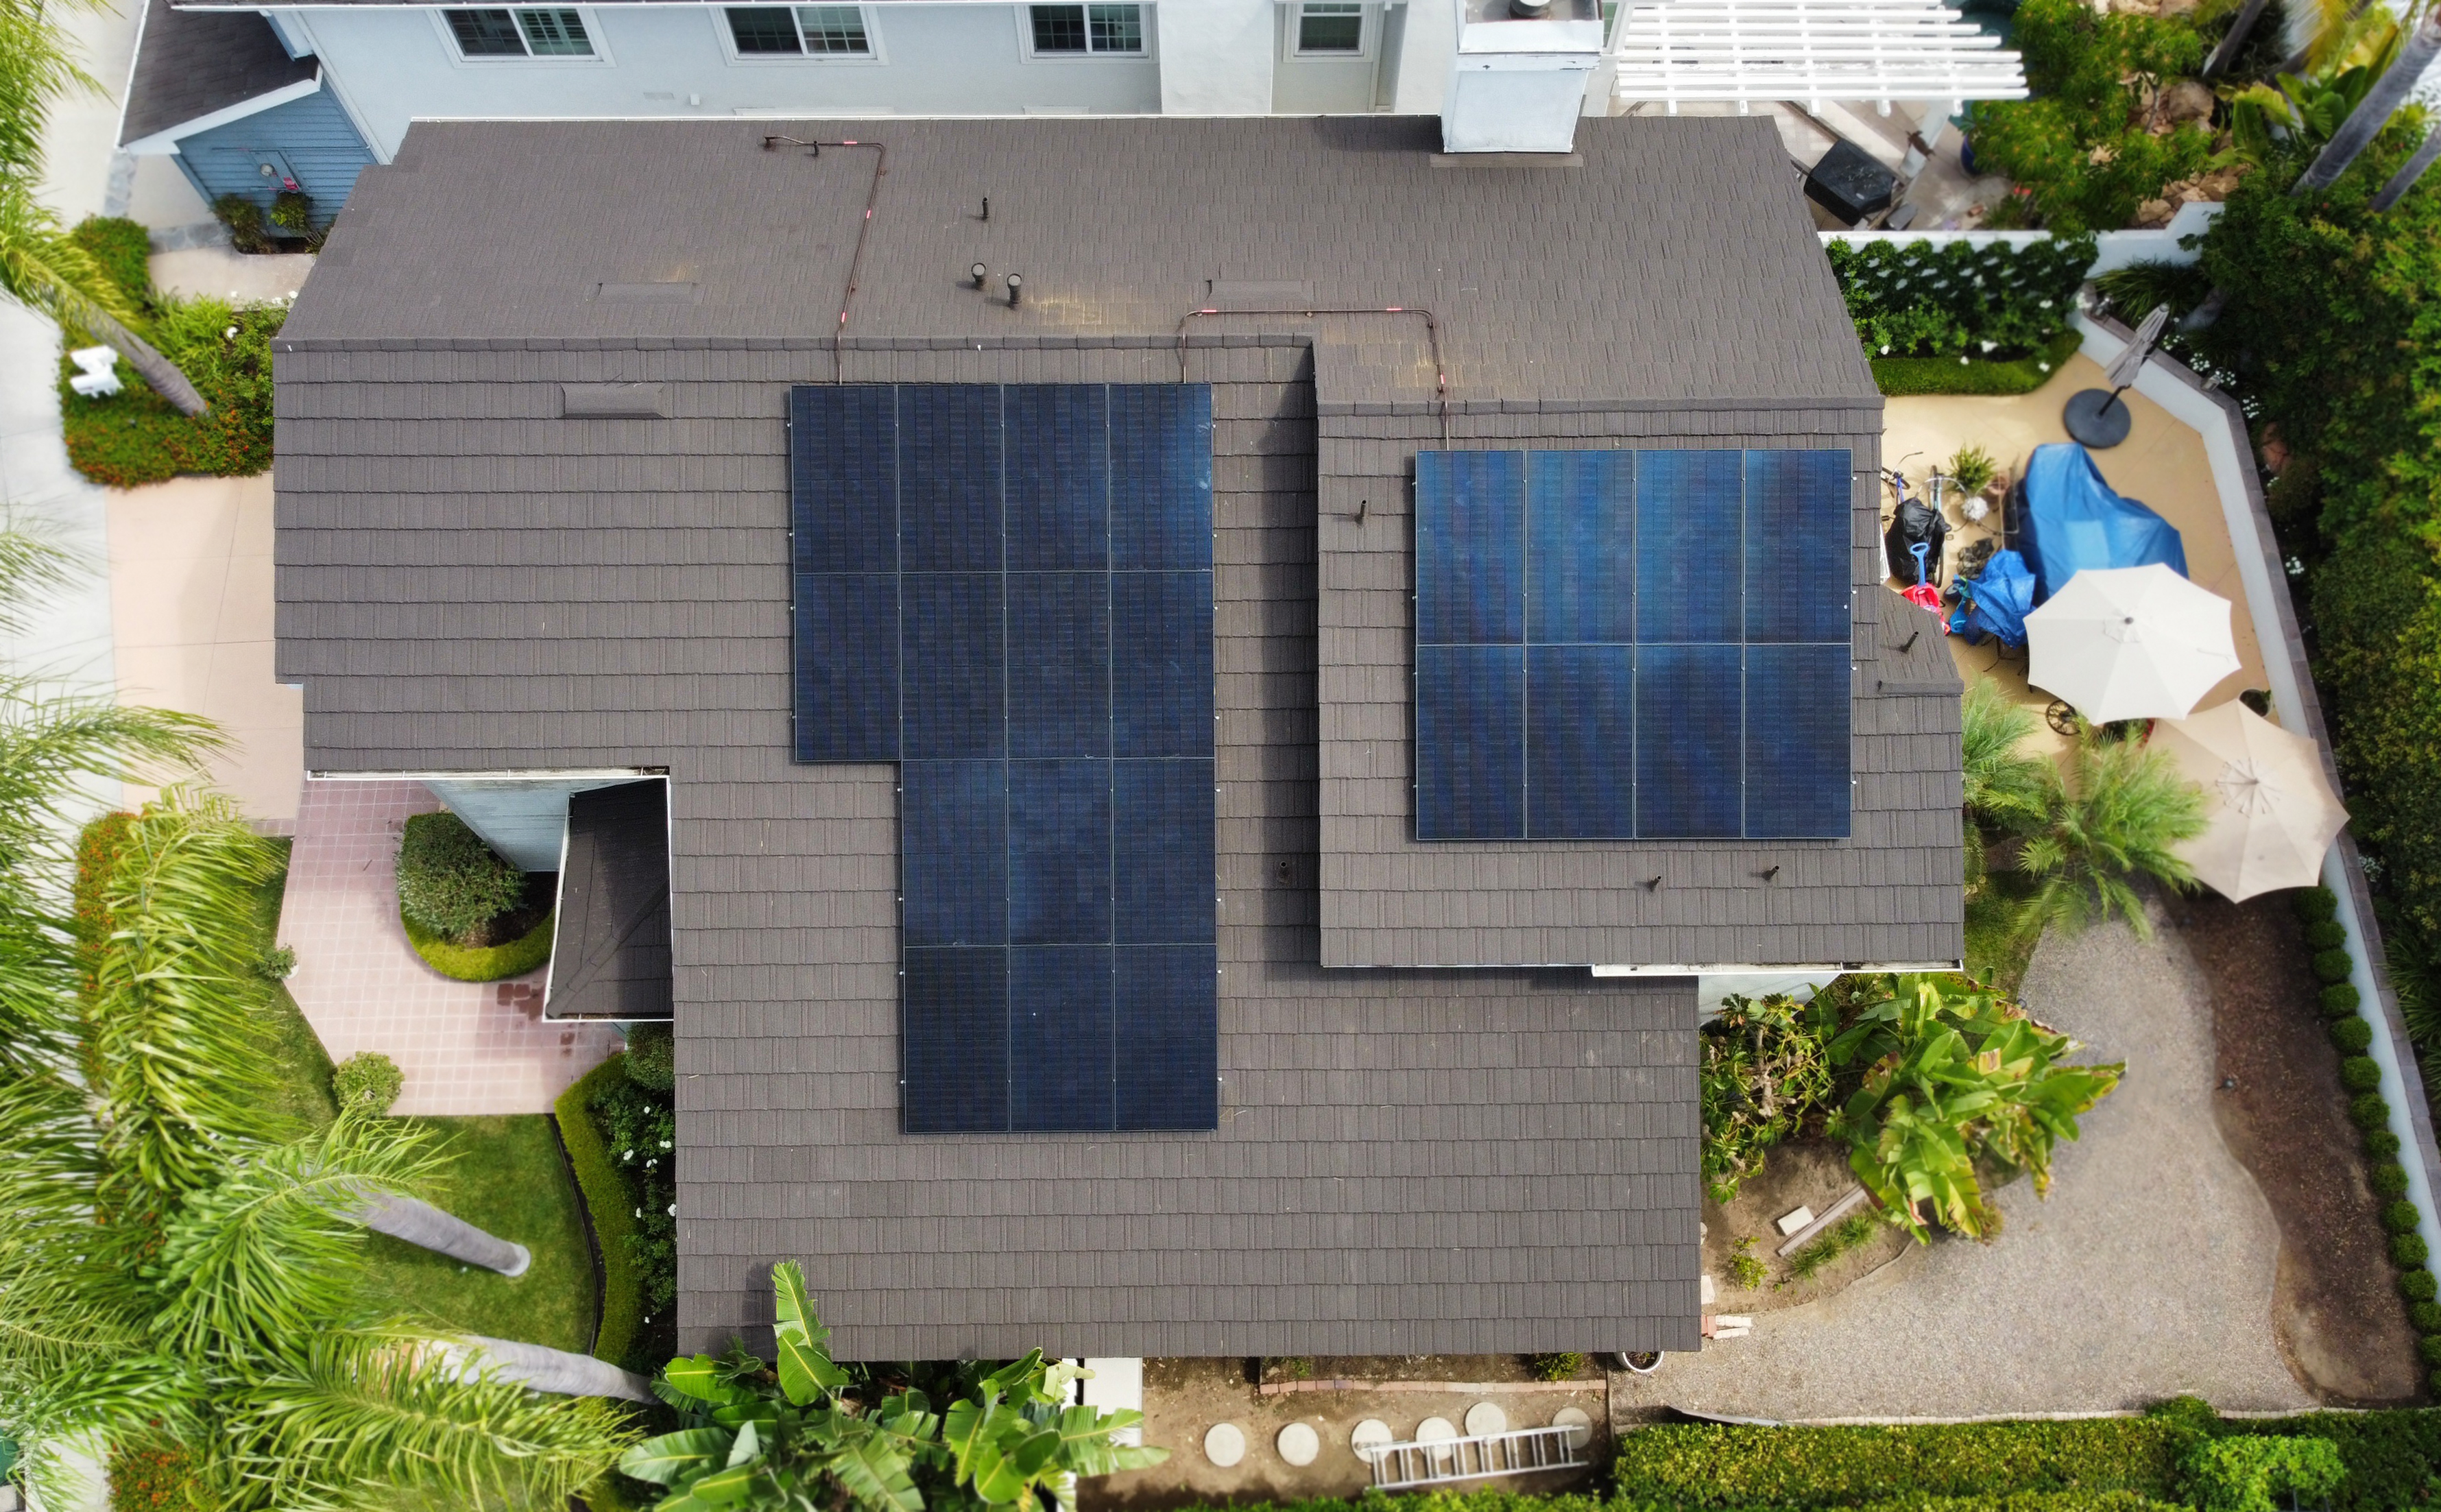
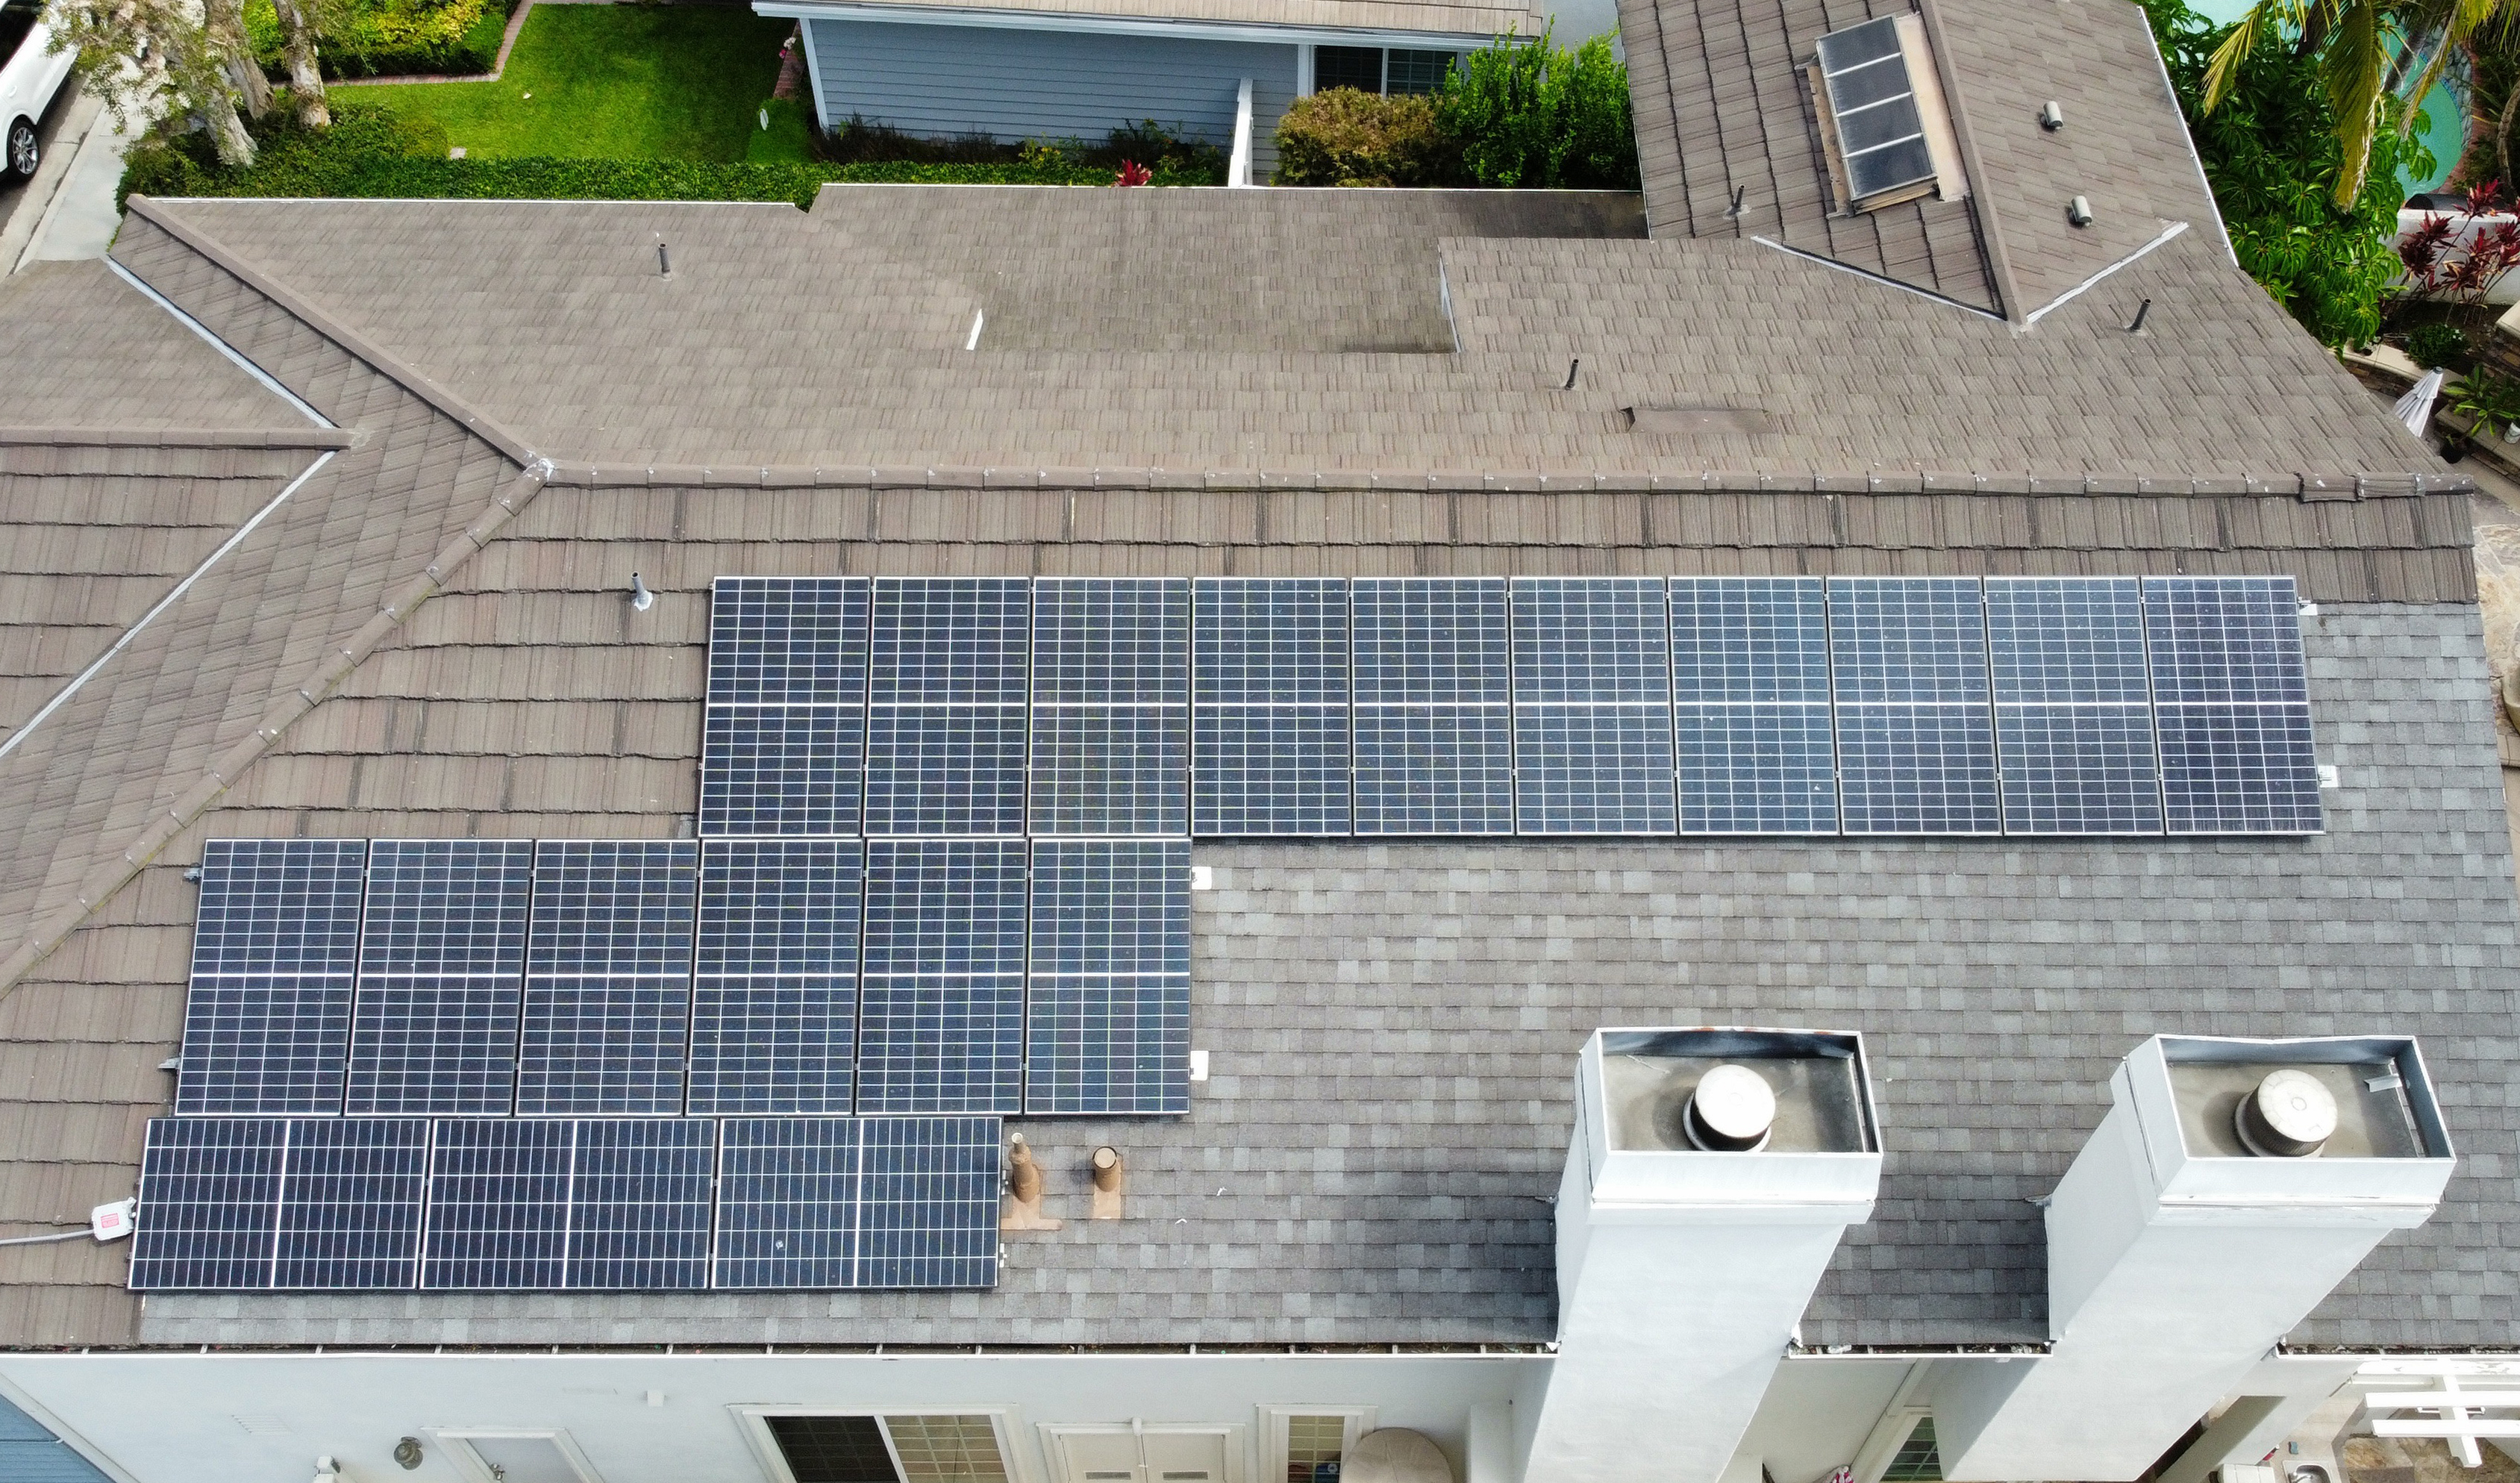
The photo above shows the roof after installers finished, and with all the same roofing material still installed. Whether you are installing solar on new construction or a retrofit, the steps laid out in this article will follow the same general path. We will go over those steps from a retrofit perspective and share some pro tips along the way.
*Pro tip* - how to walk on Stone Coated Steel
Walk on the nose of each panel overlap. This is the strongest point between each panel and will easily support your average strong-man roofer/solar installer. Even if you step in the wrong place the panel can be removed, re-shaped and reinstalled. The number one reason installers tell us they do not like to work with metal tile/Stone Coated Steel roofs is they are afraid they will damage the roof.
The following details show just how easy it is to install solar on a stone coated steel roof – it’s all about where you place your feet and is similar to walking on concrete & clay tiles.
Installation Steps
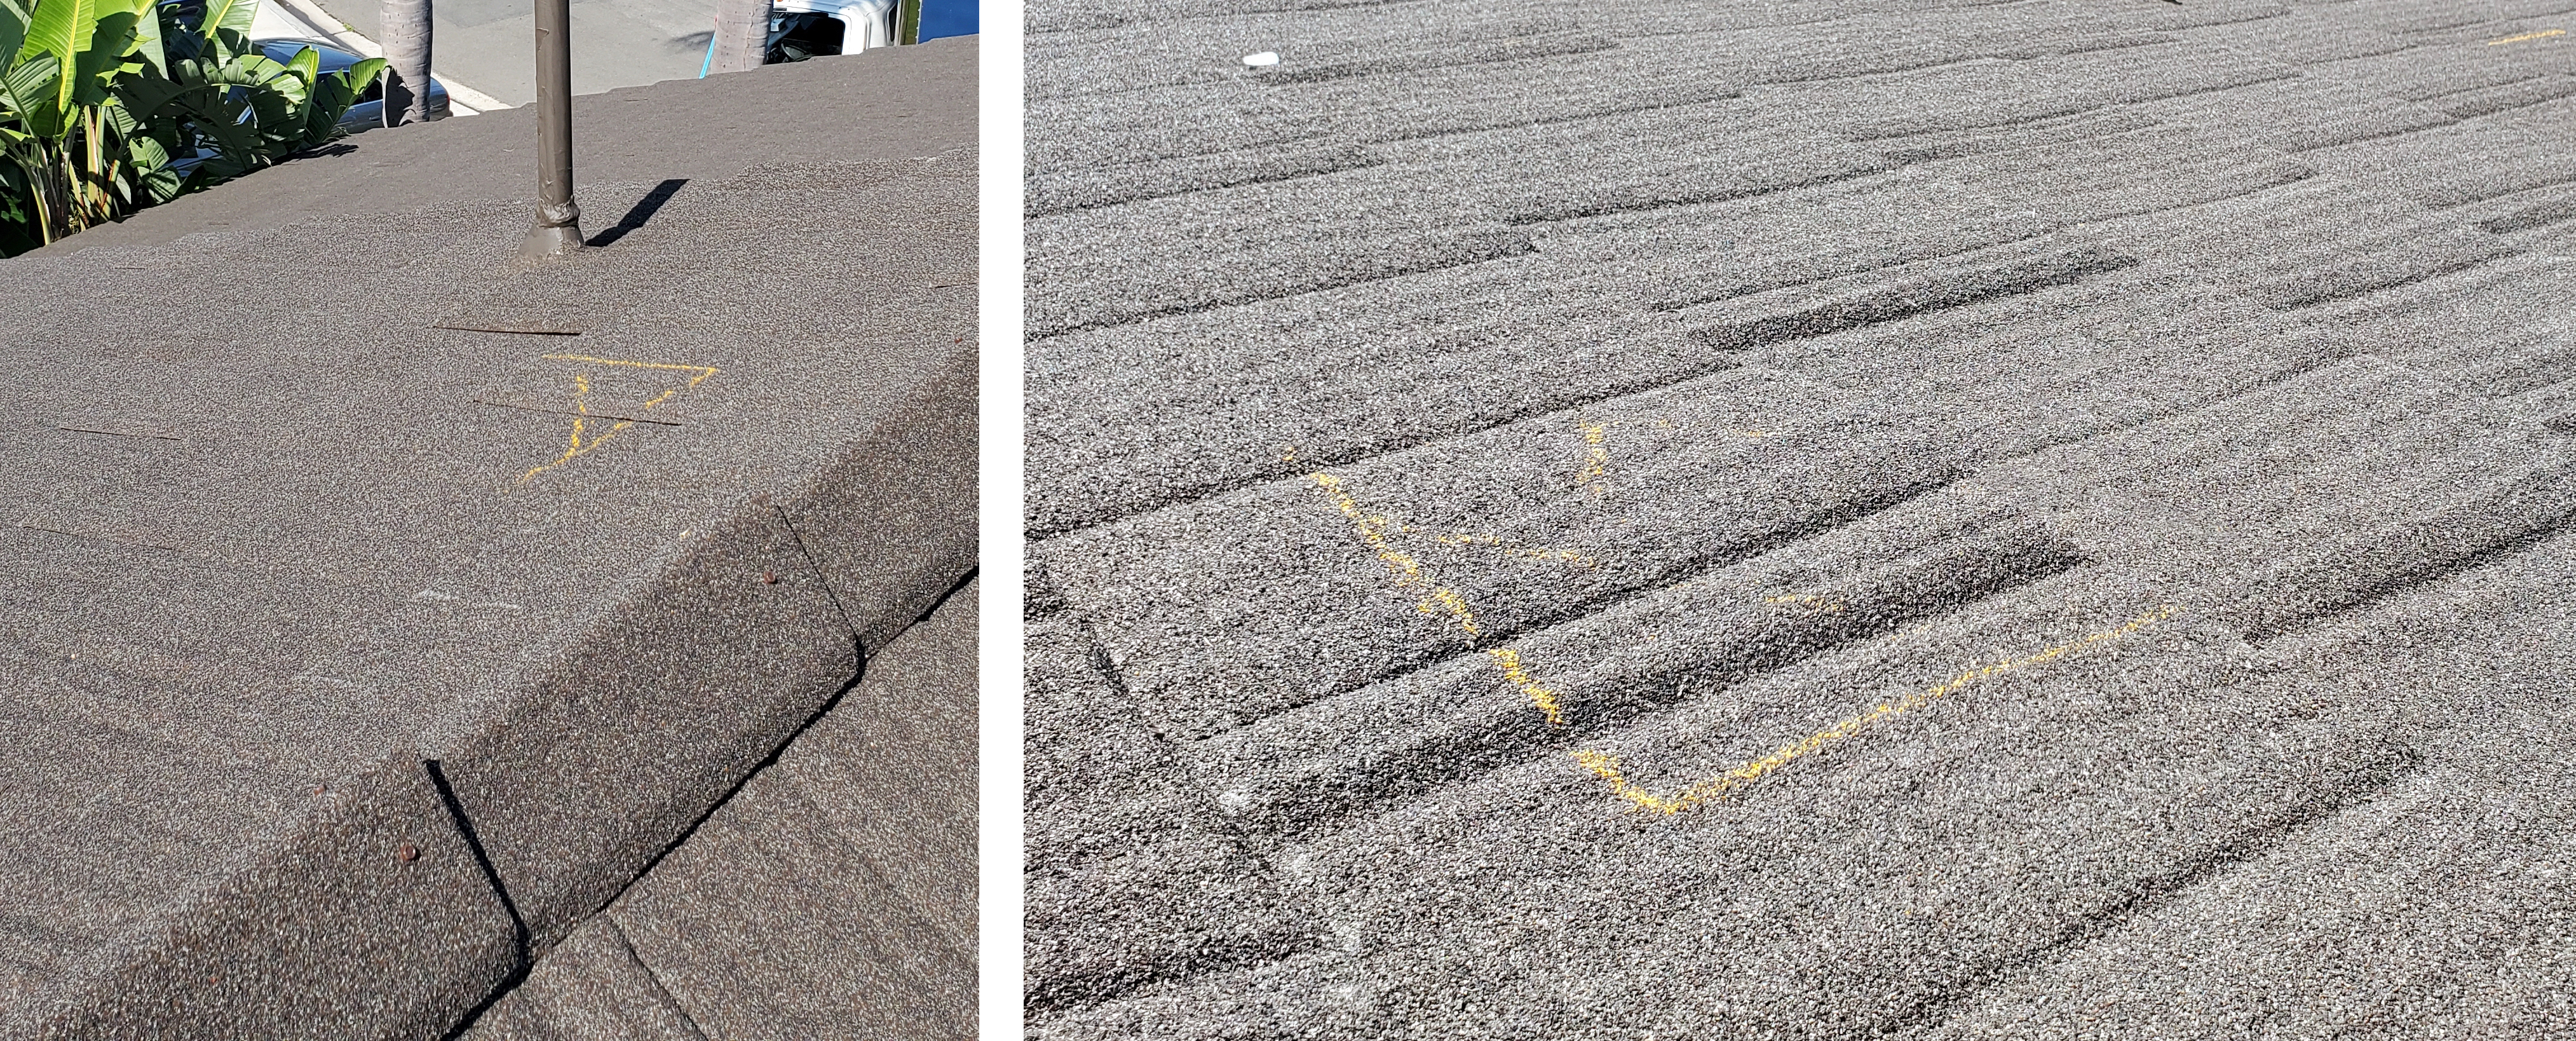
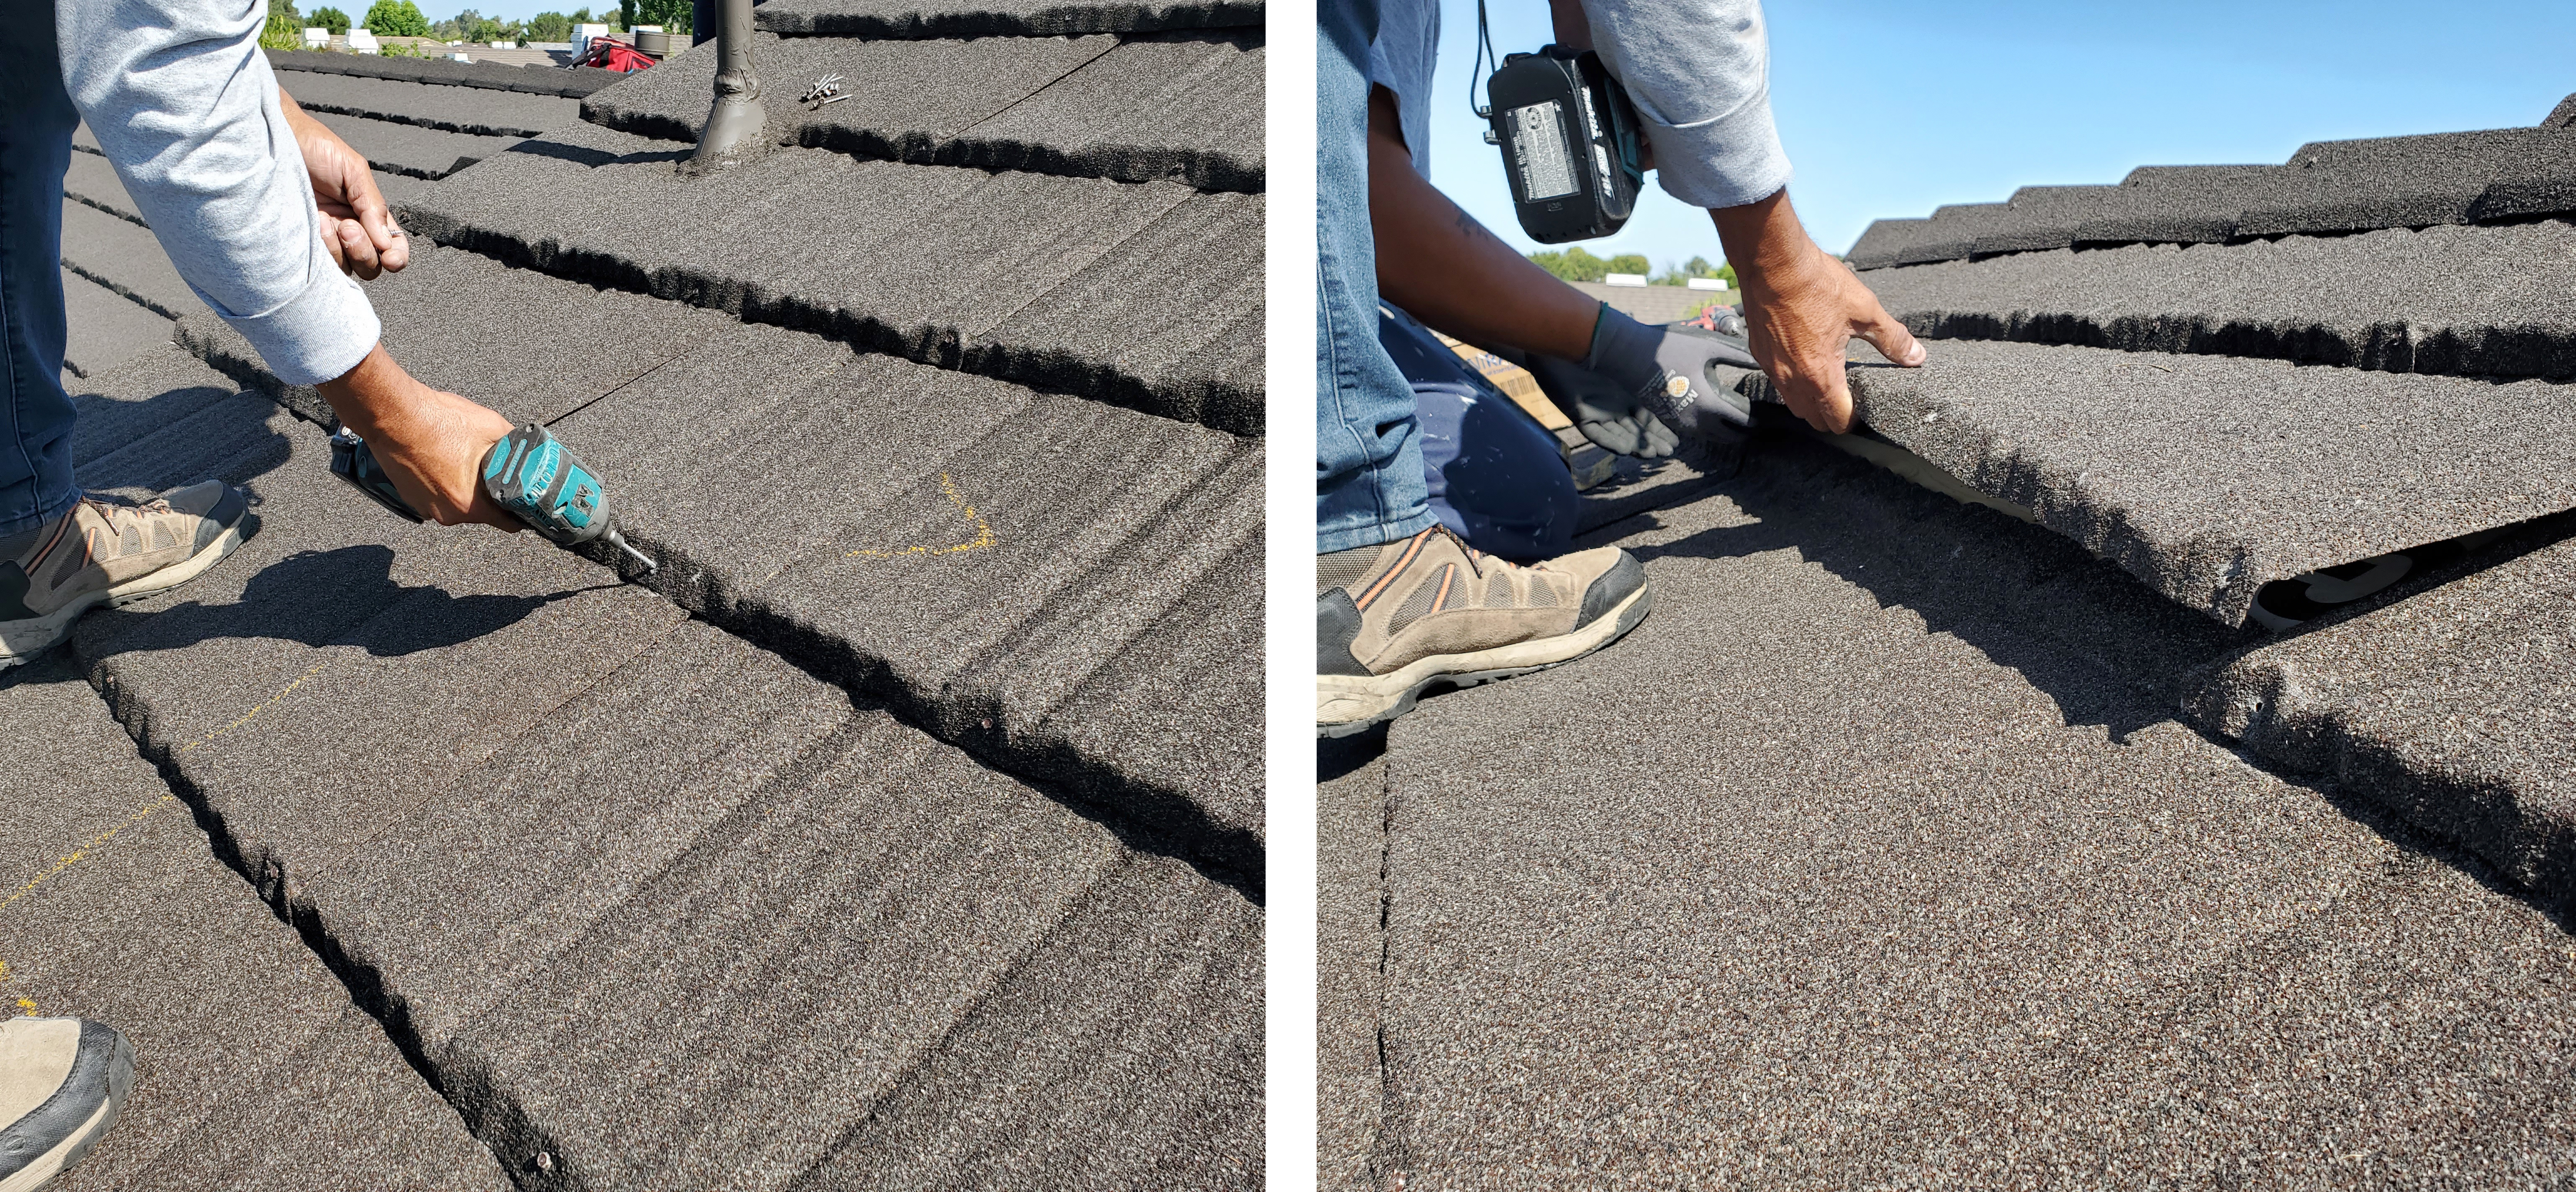
Step 1: Locate and mark the solar system rail positions on the roof
Step 2: Unfasten the panels
Prepare the roof by unfastening the nose of the overlapping panels. You only need to unfasten the bottom as the panels are flexible enough to be bent up. Leaving the back fasteners in place will make this easier. Unified Steel™ Stone Coated Steel roofs are installed using three methods:
Panel BATTENS (2x2)
Panel BATTENS (2X2) and Counter-BATTENS (1x4)
Panel DIRECT-to-Roof Deck (No battens)
This specific install was installed using a DIRECT-to-Roof Deck model.
Step 3: Lift the Panels
After removing any fasteners lift the panel enough to pull it up. A benefit found with steel roofs is their flexibility, and when it comes to retrofitting solar you can easily bend the panels upward without damaging them.
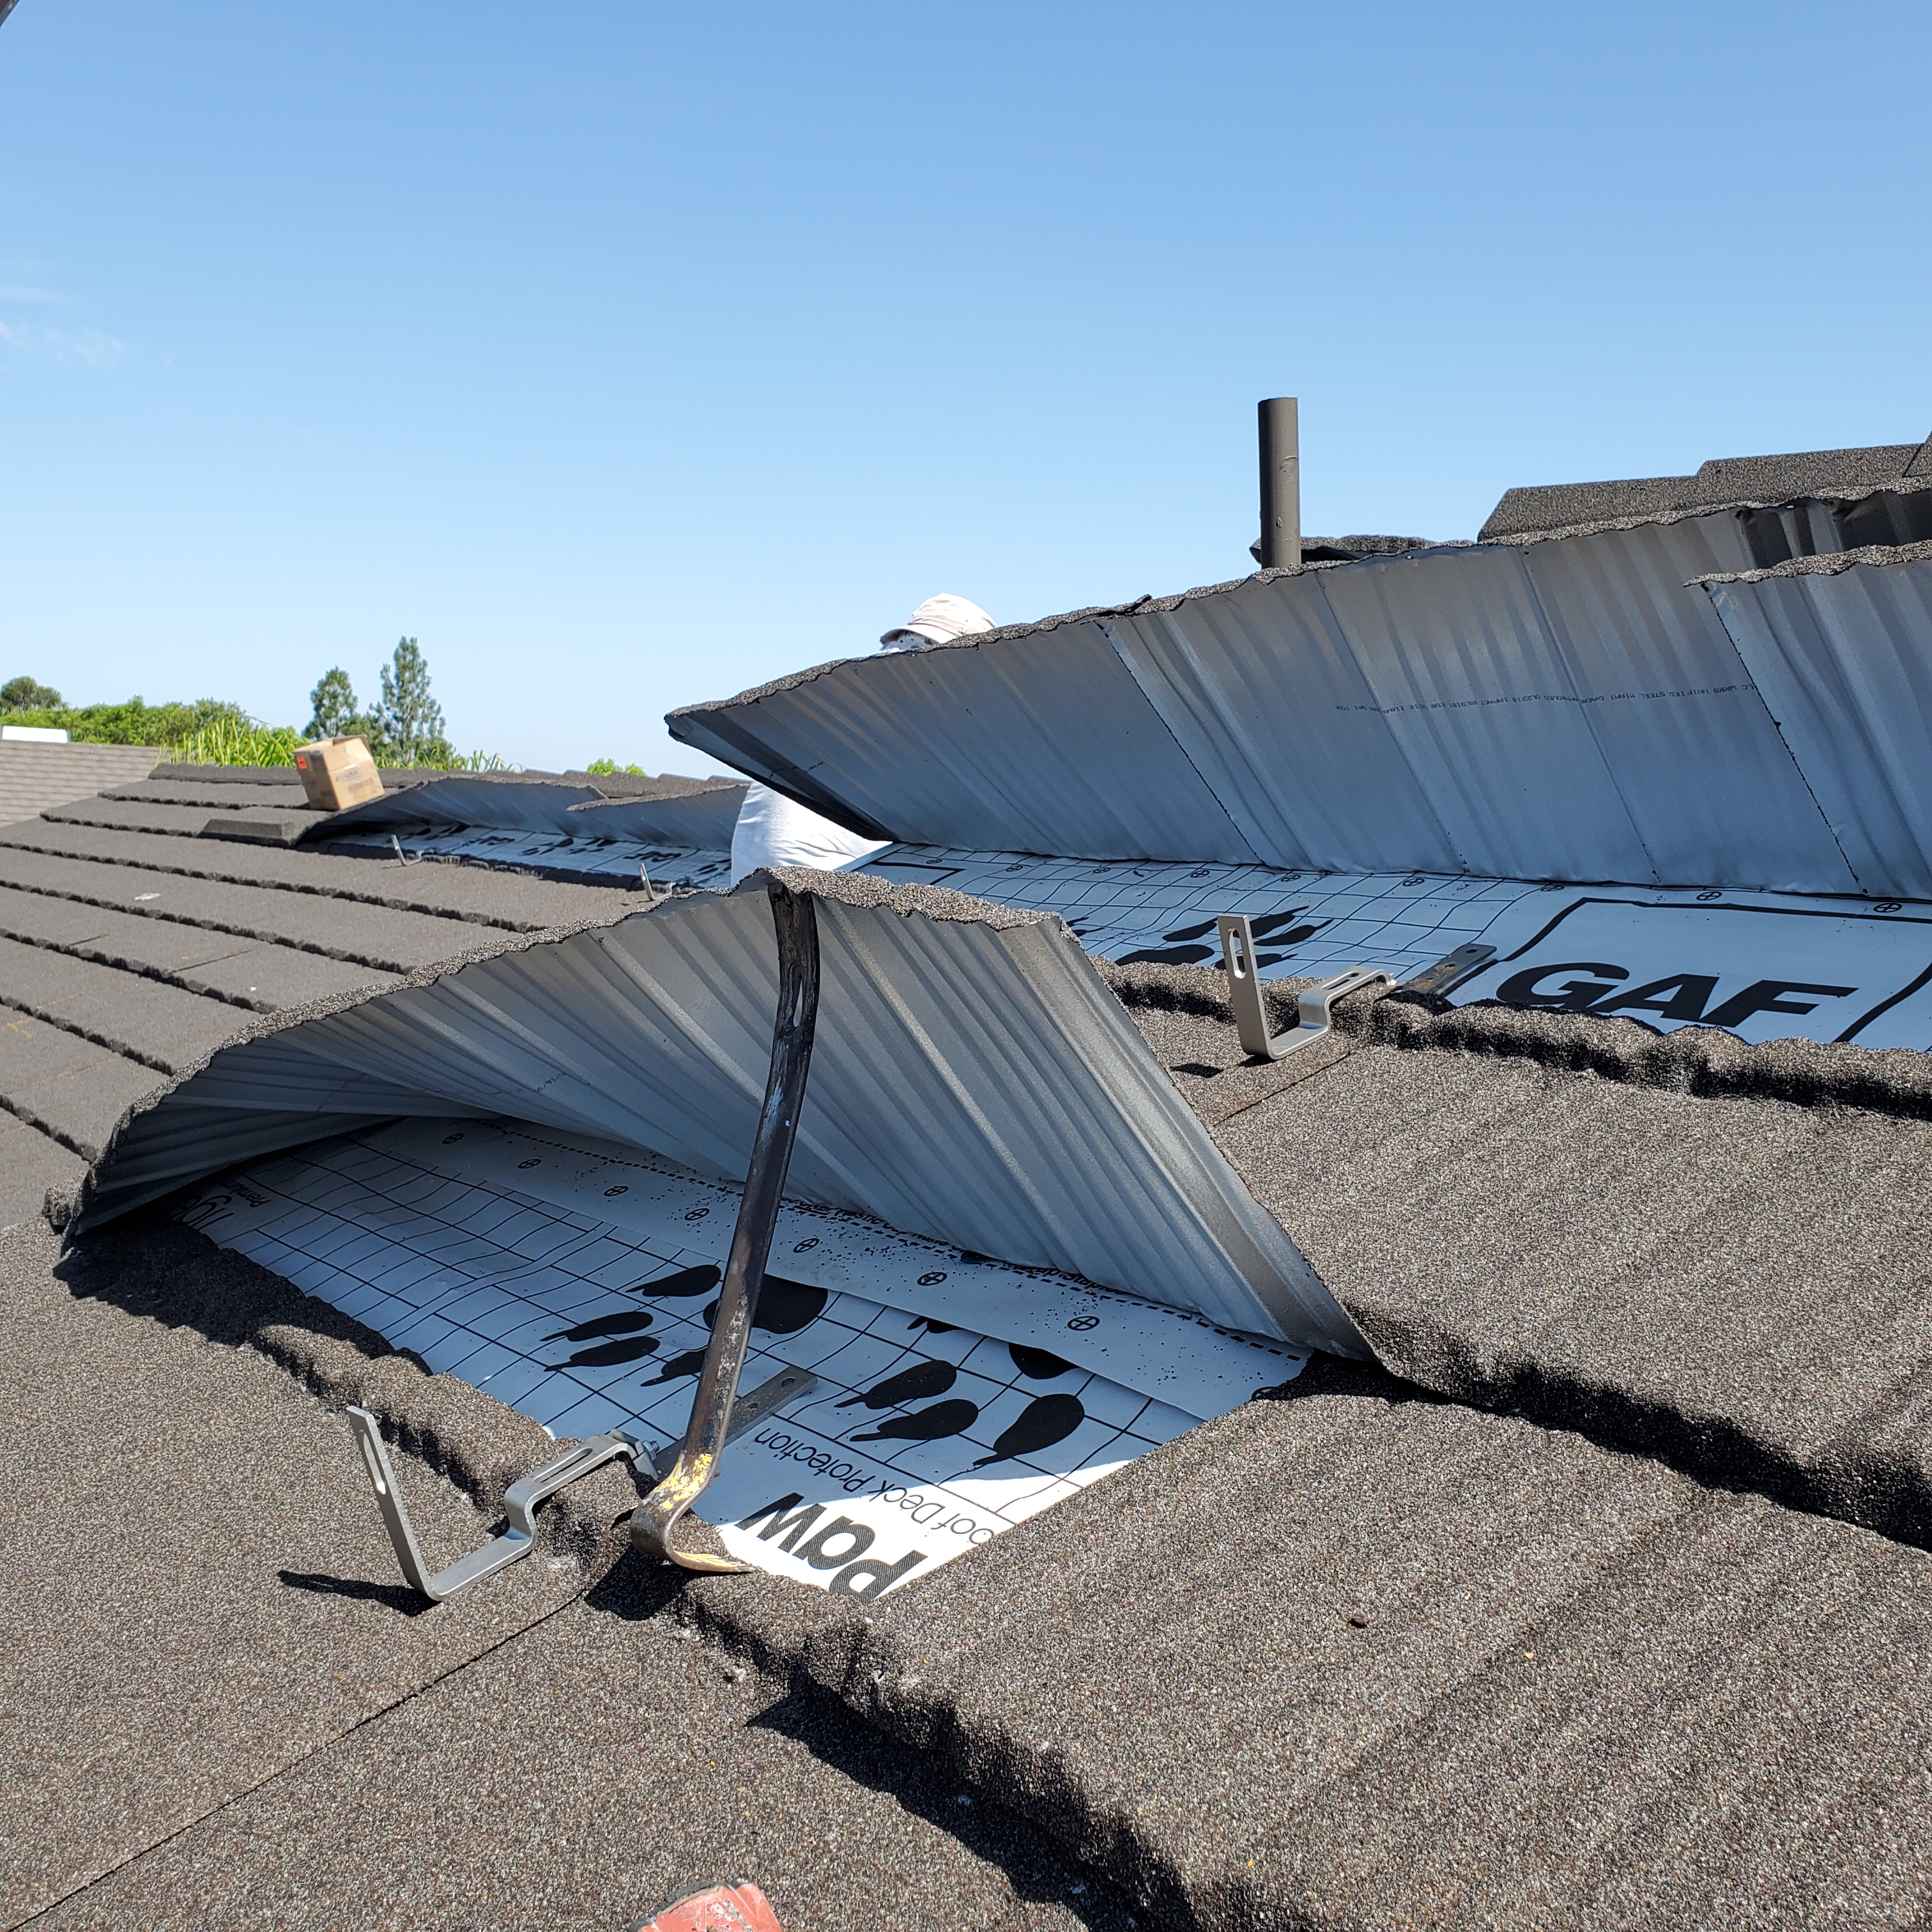
*Protip*
Prybar wedge. We found the installers' use of the prybar ingenius – for extra space the prybar supports the raised roof panel allowing you enough room to get your drill-gun in comfortably.
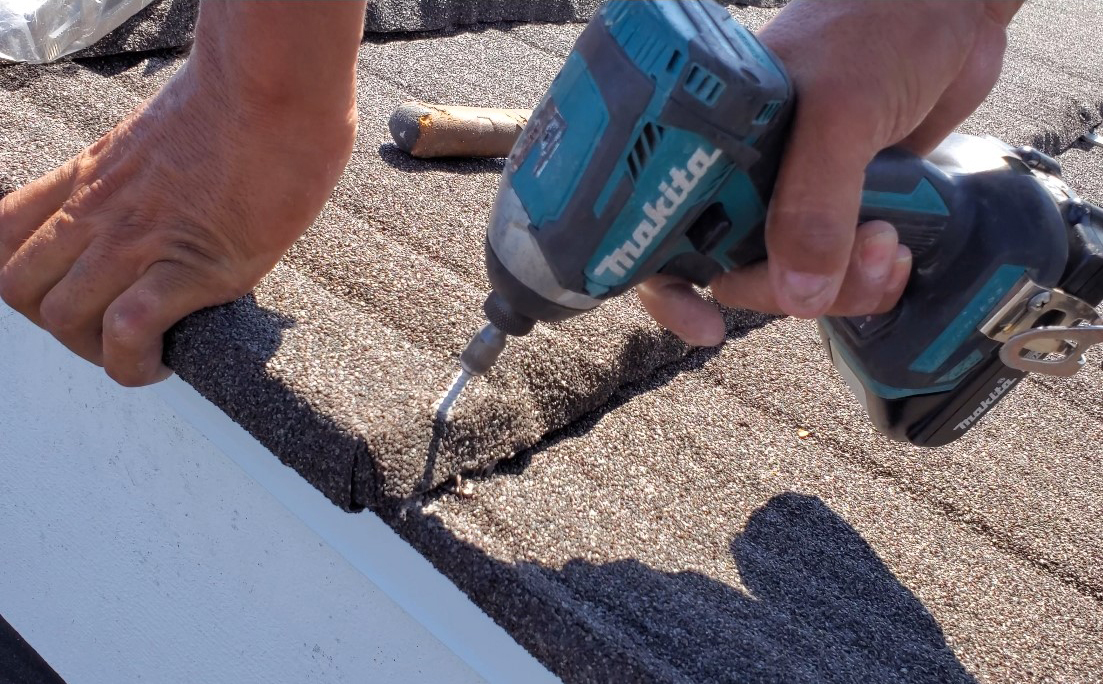
Step 4: Locate rafters and Predrill
Find the rafters. If the eaves are open you can usually identify the rafter position from the exposed rafter tails visible under the eaves. Place your QuickBOLT solar mounts on the rafter line then predrill two pilot holes for mounting screws.
All of QuickBOLT’s hook SKUs have variations available with or without mounting screws, Unified Steel™ offer the hook’s with two 5/16” x 3” screws per hook. QuickBOLT’s wood division Quickscrews is an expert in specialty wood screws and produces the smoothest driving mounting screws you will ever use.
Step 5: Add some sealant for extra measure!
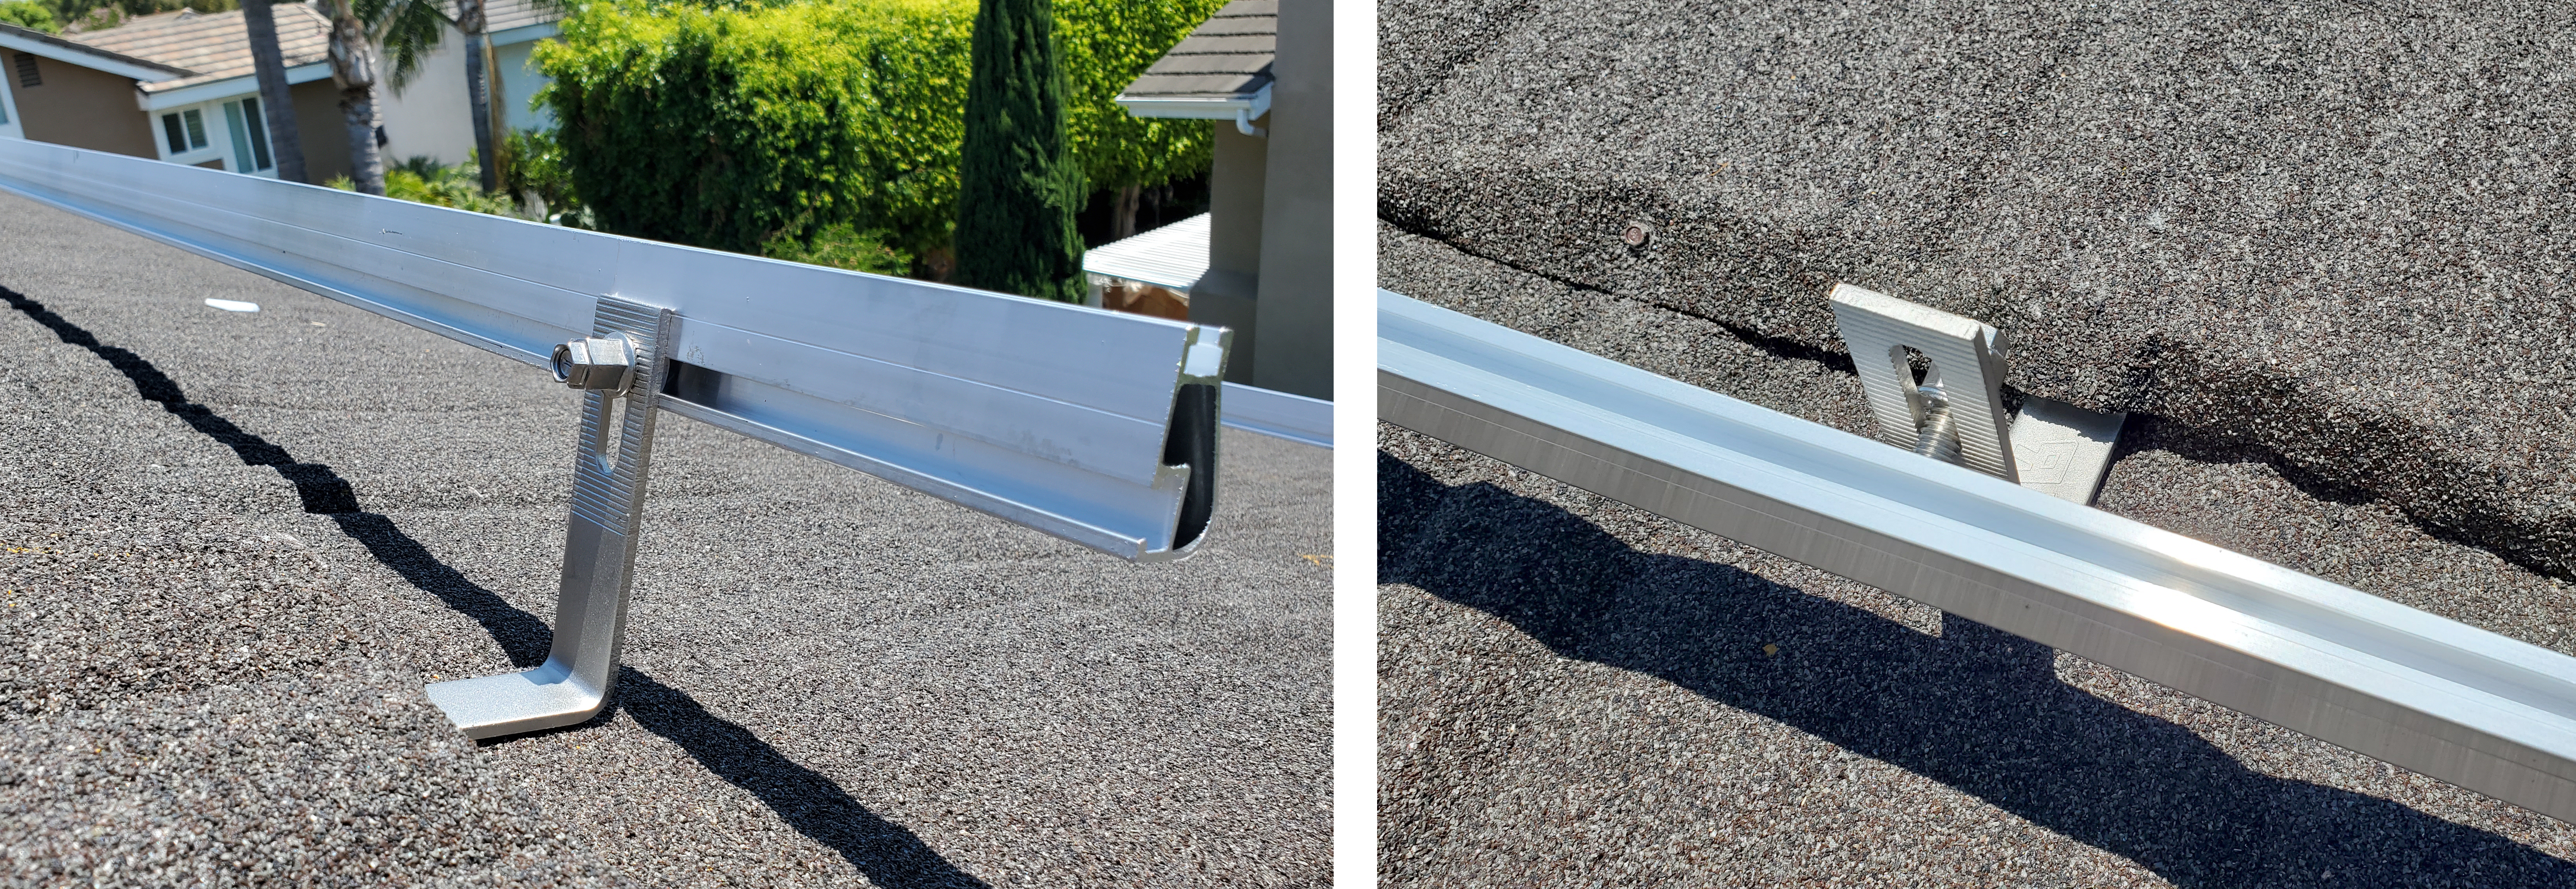
Sealant is a welcome addition in the pilot holes, as it maintains the integrity of the original underlayment. When it comes to Unified Steel™ Stone Coated Steel roofs, QuickBOLT Solar Mounts are installed without making any *penetrations through the Unified Steel™ panels. By flaring the nose of the upper cover panel directly above the solar mount, the arm of the mount easily exits between the panel courses – see Step 8 for a photo example. When the cover panel is fastened the system does not require any flashing to provide a weather seal around the bracket. As always, you should refer to your local AHJ to know what is required to pass permitting.
Step 6: Drill, baby, drill
Drive those screws until the mount is secure, and move on to step 7! Lucky for you you're using QuickBOLT's legendary mounting screws which drive like a knife into butter.

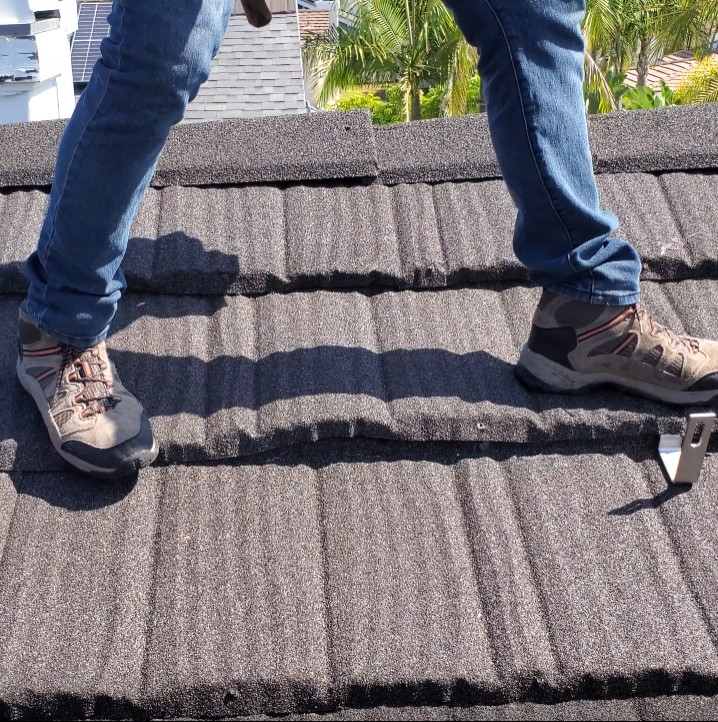
Step 7: Lower panels and refasten
*Pro tip*
Walk it back down. You can lower the panels back into place by walking across the panel nose as this locates them back into the correct location so you can reinstall the fasteners.
Step 8: Attach the solar system rails
Most rails are attached with a t-bolt which can be inserted, rotated, then slid into the correct position on the rail to slot through your solar mount attachment point.
Step 9 and Onward: Attach your solar panels.
This step is beyond the scope of this article and will vary widely depending on the solar panels used in your installation. Below are photos of the finished roof.

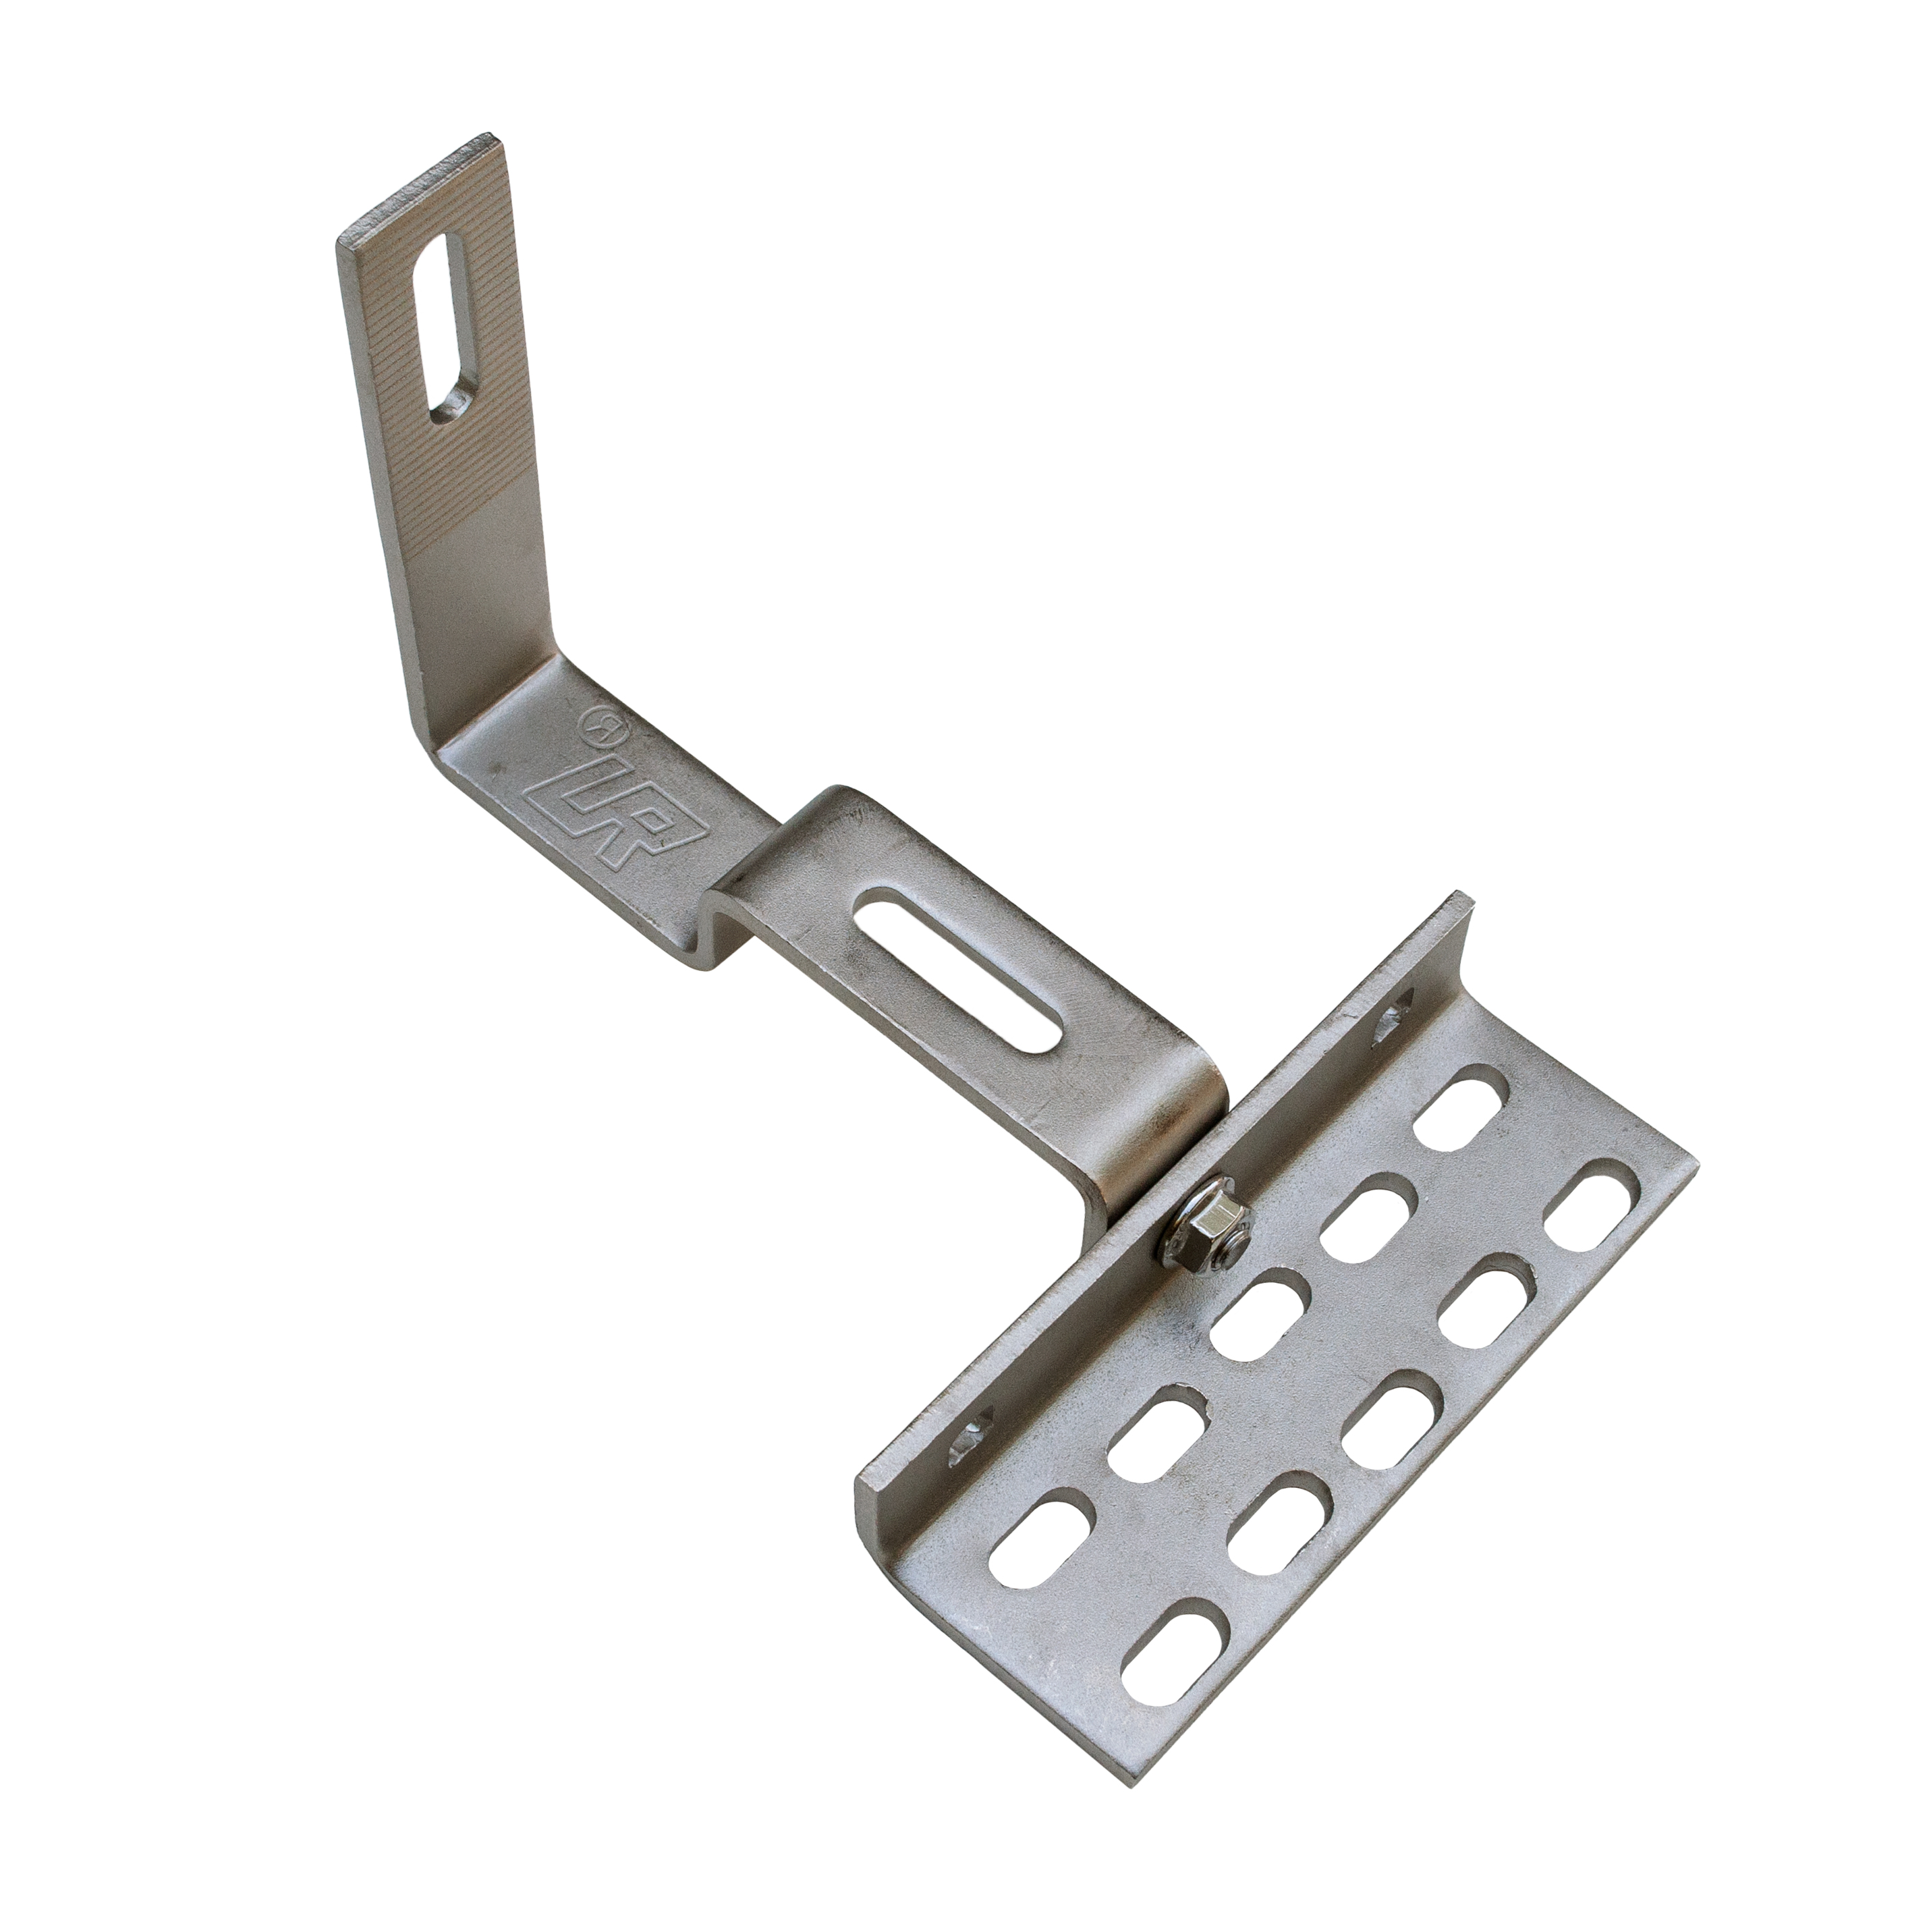
Solar Mount 17566 the fruit of Collaboration
We developed our newest mount – 17566 – with Unified Steel’s™ help, and the solution demonstrates how collaboration can benefit the entire roofing/solar industry. We took the arm from our SCS hooks which were designed to bridge the overlap on Stone Coated Steel roof panels and attached it with the wide base used in our Curved Tile solar mounts. The wide base allows installers to bolt into the roof rafter and adjust the arm according to the location of the barrel on curved profile models.
____________________________
[1] Westlake Royal Roofing LLC is a manufacturer of roofing tiles. Westlake does not manufacture solar panels, nor does Westlake install solar panels, nor does Westlake hold itself out as an expert related to the installation of solar panels. Westlake and its marketing affiliates shall not be responsible for the use of the information in this article, or any method mentioned, and readers should make their own determination of the suitability of the methods described for their projects. No warranty is made related to anything stated herein, and nothing herein waives any of Westlake’s conditions of sale for Unified Steel™ products.